Imagine eating a small lava cake from a mason jar while enjoying a fizzy scented bath and drinking hot chocolate from a personalized mug.
How does one achieve this awesome fantasy? Simple: Make all of this year’s Christmas/Hanukkah/Gift-Giving-Holiday gifts yourself, and then keep the leftover gift materials to make your own.
Most college students aren’t exactly swimming in money with all the time in the world on their hands, which is why many are starting to stress about how they’re going to afford gifts for everyone this holiday season.
For those who have long “nice” lists this year, here are five ideas for gifts you can make in bulk (and use the rest to make for yourself).
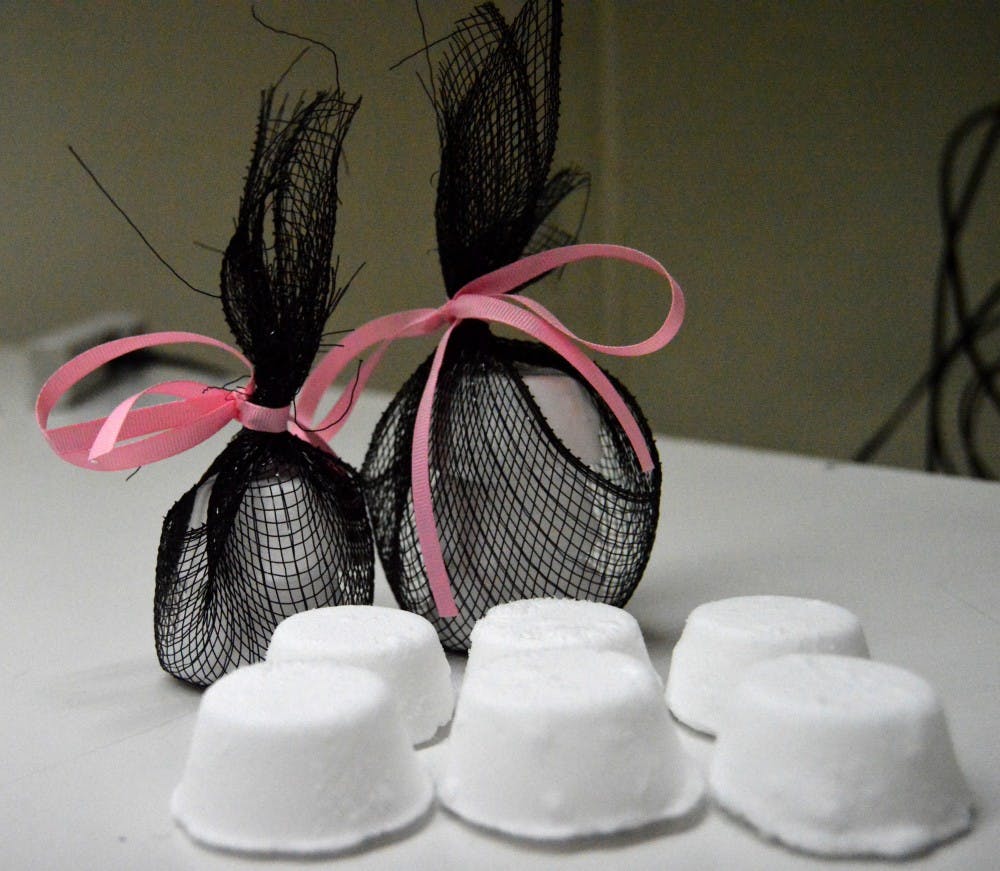
Bath bombs
Who doesn’t love a relaxing, fizzy bath? With a combination of online and Walmart shopping, you can get the necessary ingredients for about $25. Citric acid is the only thing you will need to buy online if you want to get a large amount at a cheaper price. For last-minute shopping, citric acid is available at Natural Grocers stores, but it costs more there.
What you’ll need:
1. Twenty-four-cavity mini-muffin pan
2. Citric acid
3. Baking soda
4. Witch hazel
5. Fragrance oil
Get content from The Daily Lobo delivered to your inbox
6. (Optional) Non-water based liquid colorant
These ingredients are all you need to make fragrant and relaxing bath bombs for bath-loving friends and family members to enjoy. If you put a little extra cash into some tulle and ribbon, you can package them nicely, too. If you give two or three bombs to each person, one batch will make enough for 8-12 people. That’s less than four dollars per person.
Here’s a basic run-down on making one batch of 24 bombs:
1. Pour 2 cups of baking soda and 1 cup of citric acid into bowl. Work out any clumps in the powder by mixing.
2. Add fragrance oil. The more you add, the stronger the scent of the bombs.
3. Thoroughly mix oil into the powder.
4. (Optional) Add non-water-based liquid colorant and mix. Keep in mind that if you add too much, it will color the bath water when used.
5. Spray the entire mixture with witch hazel as needed, until a clump of it will retain a mold of your fingers when squeezed in your hand.
6. Put the mixture in your mini-muffin pan. Make sure to pack each mold tightly with as much mixture as you can press into it. This will keep your bomb together.
7. Let bombs sit in pan for 10 minutes.
8. Carefully turn pan over and gently tap bombs out.
9. Let sit overnight to completely dry.
For more detailed instructions with pictures, Google “bath bombs something turquoise” and click on the first option to find the original tutorial from Something Turquoise. Keep in mind the measurements given in this tutorial are for making a batch of 12 bombs, not 24.
Picture Coasters
These personal gifts are time-consuming to make, but you can make a ton at once for about $30 (plus tax). These thoughtful gifts will do more than show your loved ones how much you care: the waterproof coasters will also protect their furniture from water damage. It doesn’t get better than a gift that’s both personal and functional.
What you’ll need:
1. Eight-ounce bottle of Mod Podge
2. Two foam brushes
3. Acrylic sealer
4. Sticky felt
5. Two 9-packs of 4-by-4-inch natural stone tiles (price may vary depending on the tiles you choose).
6. Eighteen printed pictures
These ingredients are enough to make a personalized coaster for 18 people. If you have a color printer, you can print all the photos you want to use on photo paper, or you can get all of your pictures copied at a FedEx office for just a few dollars.
Basic instructions:
1. Cut pictures into 4-by-4-inch squares.
2. Coat tile in a layer of Mod Podge.
3. Press picture onto tile. Let Mod Podge dry for 20 minutes.
4. Coat top of picture with Mod Podge. Let dry for 20 minutes.
5. Add final coat of Mod Podge.
6. Cut sticky felt into four 1-by-1-inch squares.
7. Stick felt squares on each corner of bottom of coaster. If you don’t use sticky felt, you can use hot glue and regular felt instead.
8. Spray completed tiles with acrylic sealant after Mod Podge has dried for 20 minutes, and let dry for as long as sealant can recommends.
For more detailed instructions with pictures, Google “picture coasters popsugar” and click on the first option to find the original tutorial from Popsugar.
Custard Cup Lava Cakes
These yummy gifts cook in the microwave in one minute, and one family-sized box of brownie mix makes enough cakes for eight people for about $30 – less than four dollars per person.
What you’ll need:
1. Eight 6-ounce custard cups (with lids)
2. Three eggs
3. Oil
4. Cooking spray
5. One family-sized box of Pillsbury chocolate fudge brownie mix
6. One bag of Dove dark chocolate promises.
The most expensive part is the $13-plus shipping on Amazon for eight custard cups. This gift is the perfect treat for chocolate lovers this holiday season.
Basic Instructions:
1. Pour brownie mix in bowl and whisk out clumps.
2. Spray each custard cup with cooking spray.
3. Spoon small amounts of dry brownie mix to coat inside of cup. Tap any excess on inside back into mixing bowl.
4. Add water, eggs and oil to separate bowl and whisk until combined.
5. Pour mixture in brownie mix and stir for well-mixed brownie batter.
6. Spoon batter into each custard cup until each one is half full. This should take around 1/3 cup of batter for each cup.
7. Stack two Dove chocolates and press them into the center of the batter in each cup.
8. Cover surface of candy with batter using a knife.
At this point, you can give the batter in the cup to someone with instructions on how to cook it (batter is good for a week with refrigeration), or cook them up on the day of giving and distribute them to those receiving them.
To cook:
1. Place four cakes on a plate and microwave on high for two minutes and 30 seconds. This time is given for an 1100-watt microwave.
For more detailed instructions with pictures, Google “microwave cakes the yummy life” and click on the first option to find the original tutorial from The Yummy Life.
Personalized Sharpie Mugs
This gift is perfect for the many college students who seem to live off of coffee. If you’re artistic, you can draw fancy designs and patterns into your mugs and make them that much more personal. If you feel your drawing talent is equal to that of a toddler, you can opt to outline and polka dot the sharpie around the letter stickers to make a fun monogrammed mug. Just make sure you let the person you’re giving it to know it’s hand-wash only.
What you’ll need:
1. Plain, white mugs (You can buy a case of 24 plain, white stoneware mugs from deals.com for $24 plus shipping).
2. A pack of letter stickers
3. Sharpies
4. A working oven
Basic instructions for polka dot monogramming:
1. Stick letter stickers on mug.
2. Poke sharpie all around letters until satisfied with dot cloud surrounding it. Be sure to poke all around the outline of the sticker, or the shape will be lost when the sticker is removed.
3. Remove the stickers.
4. Bake mug in oven at 350 degrees for 30 minutes. Let cool completely before washing or using.
For more detailed instructions with pictures, Google “sharpie mug a beautiful mess” and click on the first option to find the original tutorial from A Beautiful Mess for baking and curing.
To see finished polka dot monogrammed mugs, Google “sharpie mug good and messy” and click on the first option to find the original idea from Good and Messy.
Hershey’s Christmas Trees
If your budget is really tight and you’re looking for a small gift for everyone, these festive little treats are the perfect idea. However, what you save in money you pay for with time. After watching an 11-minute tutorial from someone who is experienced making these, one can estimate about 30 minutes of time for each Christmas tree. But when you’re finished, you have an adorable little cardstock Christmas tree decorated with Hershey’s Kiss ornaments and a Rolo tree trunk.
You can even add stars or bows to the top to give your trees a little extra finesse. Alternatively, you can also find a six-point and five-point Hershey’s star if you’re making gifts for a different holiday on the Qbee’s Quest website. These little treats are perfect for making a bulk gift for all the candy lovers in the family.
What you’ll need:
1. Cardstock
2. A ruler
3. A scoring stick
4. Glue (not the kid kind)
5. A bag of Hershey’s Kisses
6. A pack of Rolos
This is a very specific tutorial with a lot of specific instructions. Google “Qbee’s Quest Hershey’s Christmas tree” and click on the third option to watch the original tutorial video from Qbee’s Quest.
Skylar Griego is a culture reporter at the Daily Lobo. She can be reached at culture@dailylobo.com or on Twitter @TDLBooks.